

Quick Take
- Avalanche can be added to MetaMask either through the predefined network list or manually by entering the C-Chain’s RPC details.
- AVAX tokens can be funded using MetaMask’s native bridge feature or by withdrawing directly from centralized exchanges that support C-Chain transfers.
- MetaMask is only compatible with EVM chains and Solana — for other networks like WAX, Sui, and WEMIX, separate wallet setups are required.
If you already have a MetaMask wallet and want to interact with dApps on the Avalanche blockchain, the process of adding Avalanche’s C-Chain to MetaMask is straightforward. MetaMask supports EVM-compatible networks, which makes it easy to connect the network manually or through built-in features. Here’s how to get started.
Linking Avalanche C-Chain to MetaMask
First, make sure your MetaMask wallet is installed and set up. If not, follow our beginner’s guide to creating a MetaMask wallet before proceeding.
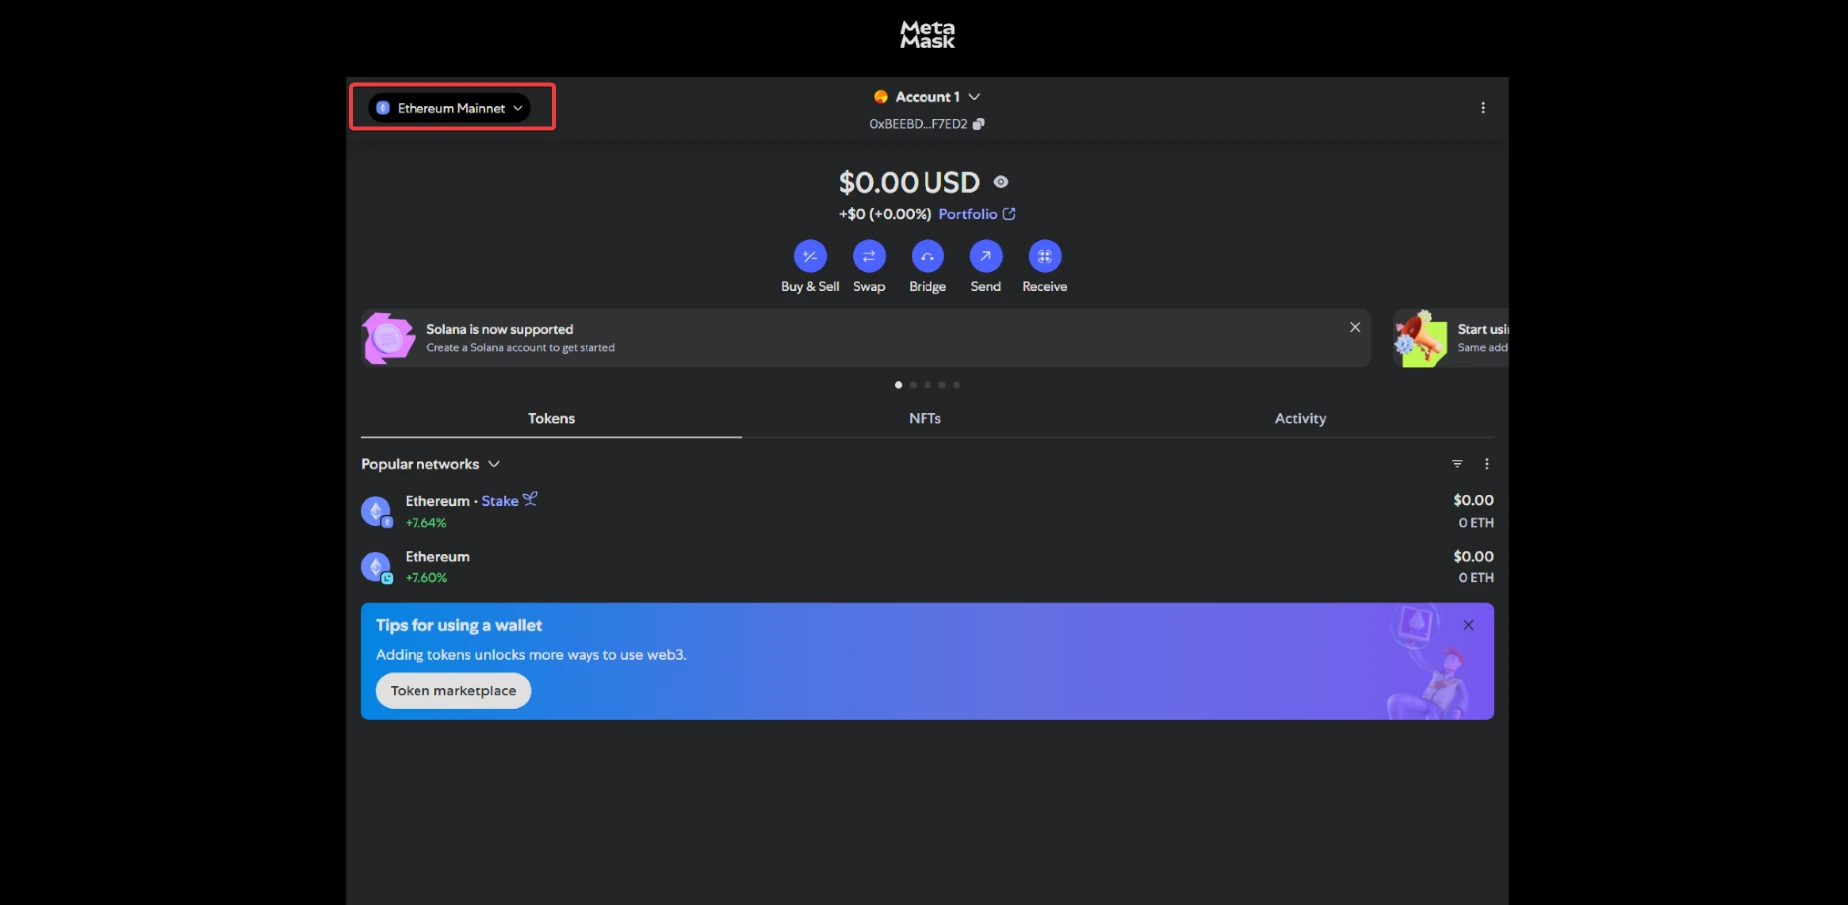
Navigate to the MetaMask extension in your browser:
- Click the network dropdown at the top left of the wallet.
- A window will appear with a list of available chains.
- Scroll down until you see Avalanche. Click Add next to it.
- When prompted, click Approve to confirm the network addition.
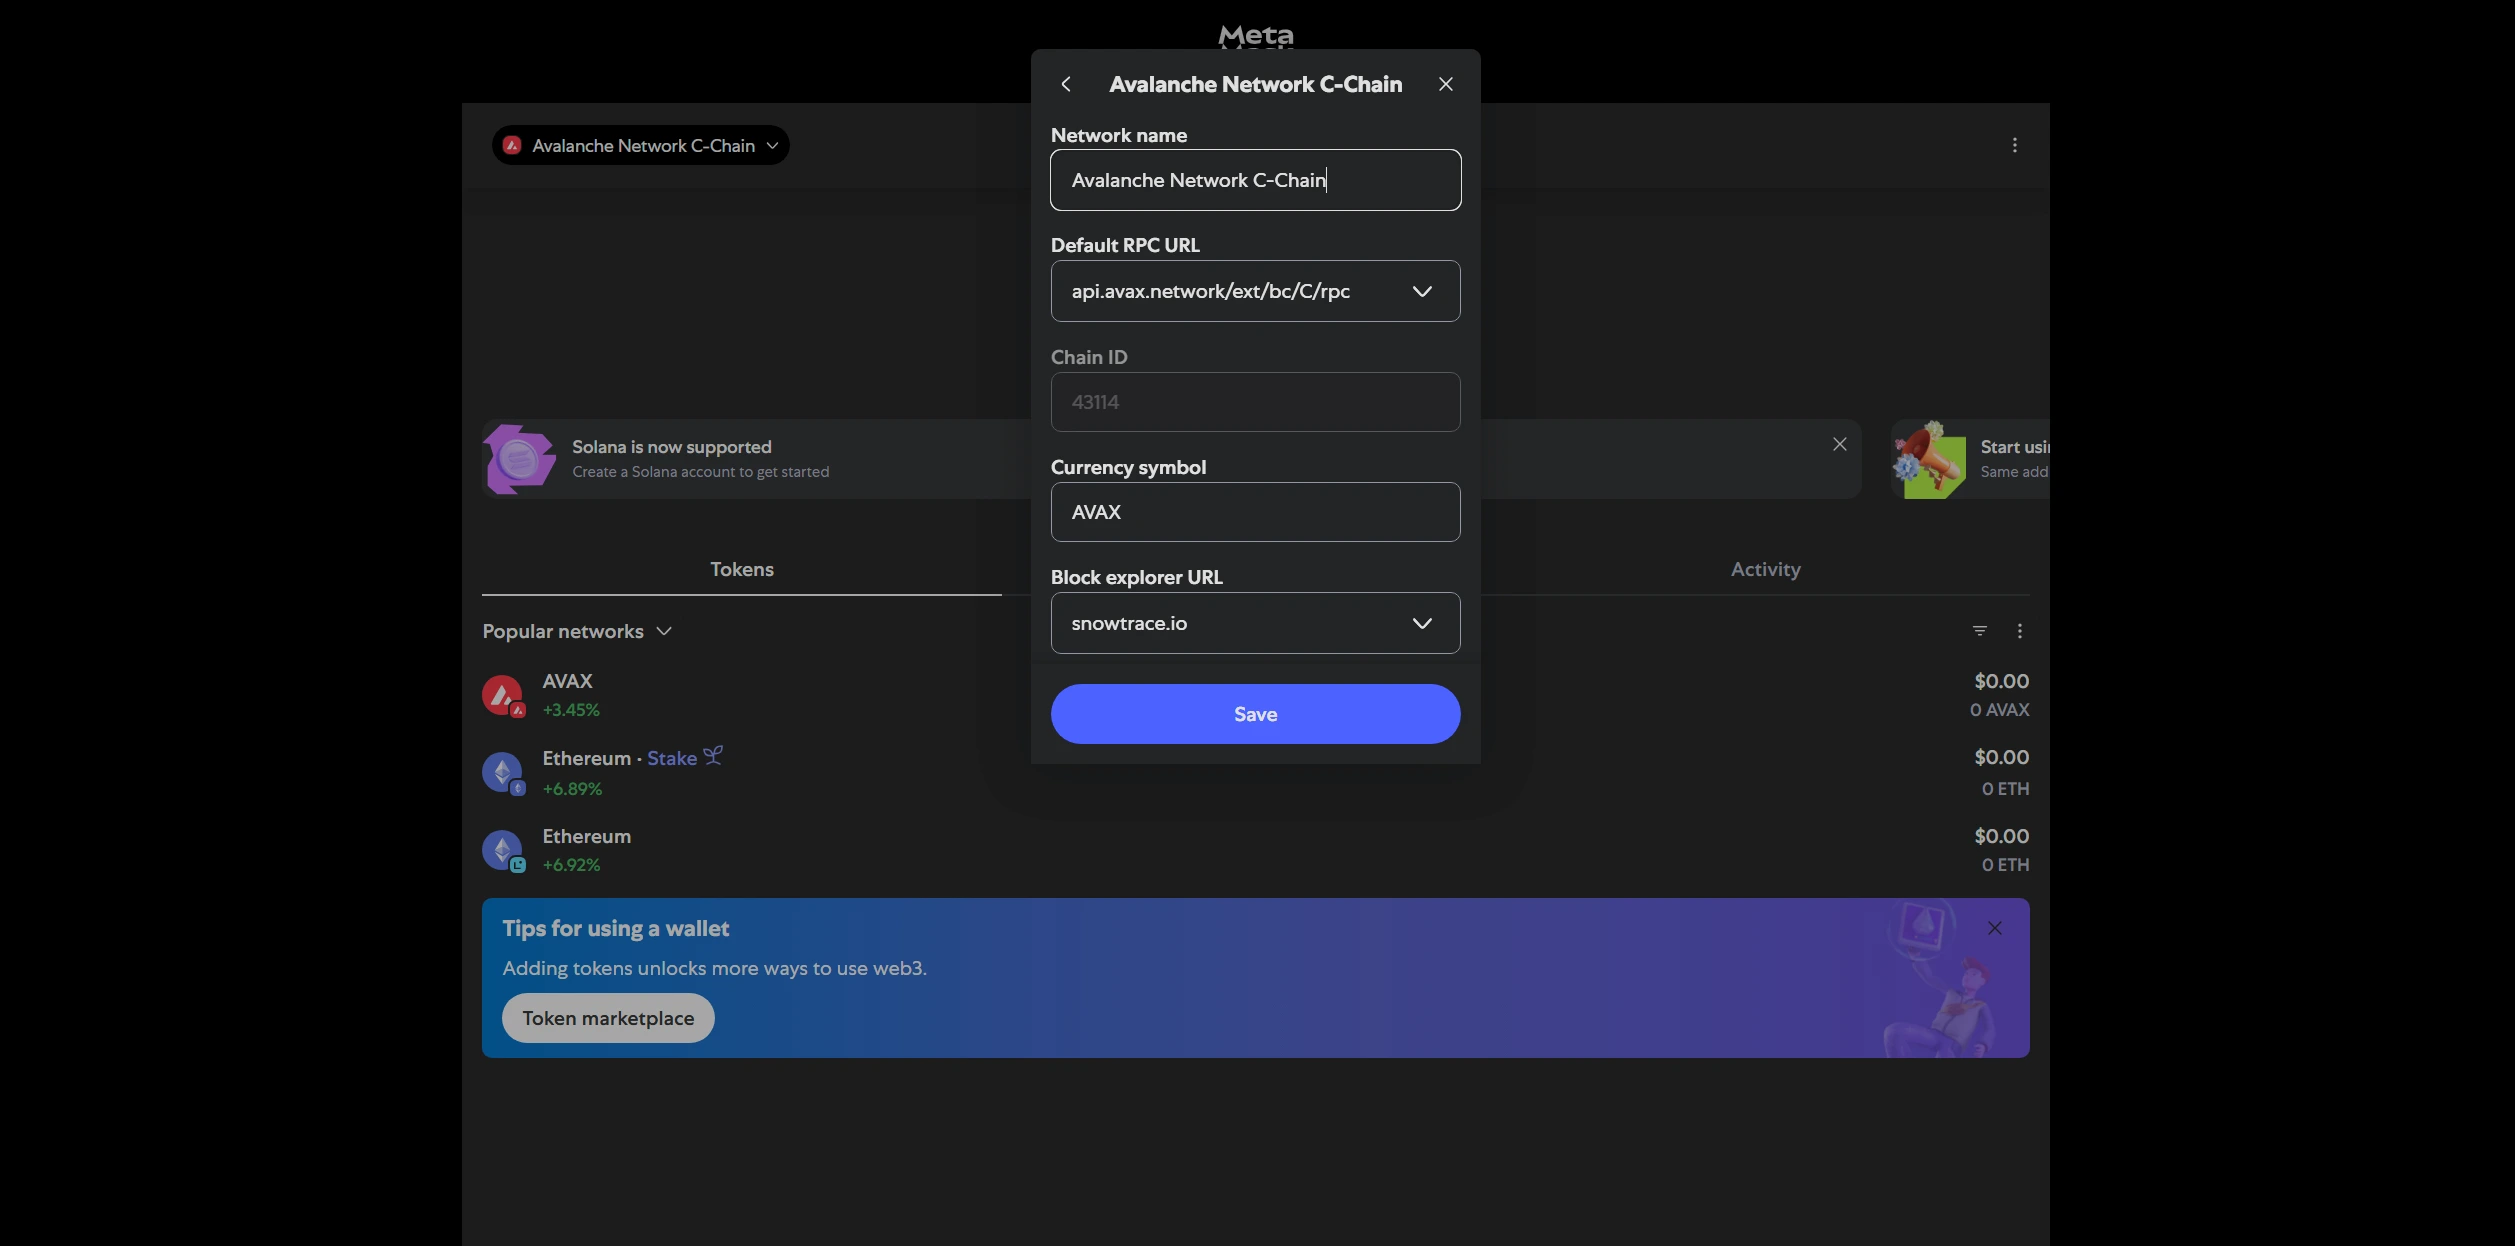
If the Avalanche network doesn’t appear in your predefined list or if you prefer to add it manually, here’s the required RPC configuration:
- Network Name: Avalanche Network
- New RPC URL: https://api.avax.network/ext/bc/C/rpc
- Chain ID: 43114
- Currency Symbol: AVAX
- Block Explorer URL: https://snowtrace.io/
To enter these manually:
- In MetaMask, go to the network dropdown at the top left of the wallet → Add custom network.
- Paste the above details into the respective fields and click Save.
- Avalanche C-Chain will now be selectable in your MetaMask network list.


Funding Your Avalanche Wallet
Once AVAX is added to MetaMask, the next step is funding it. You’ll need AVAX tokens to interact with dApps, pay gas fees, or make transfers.
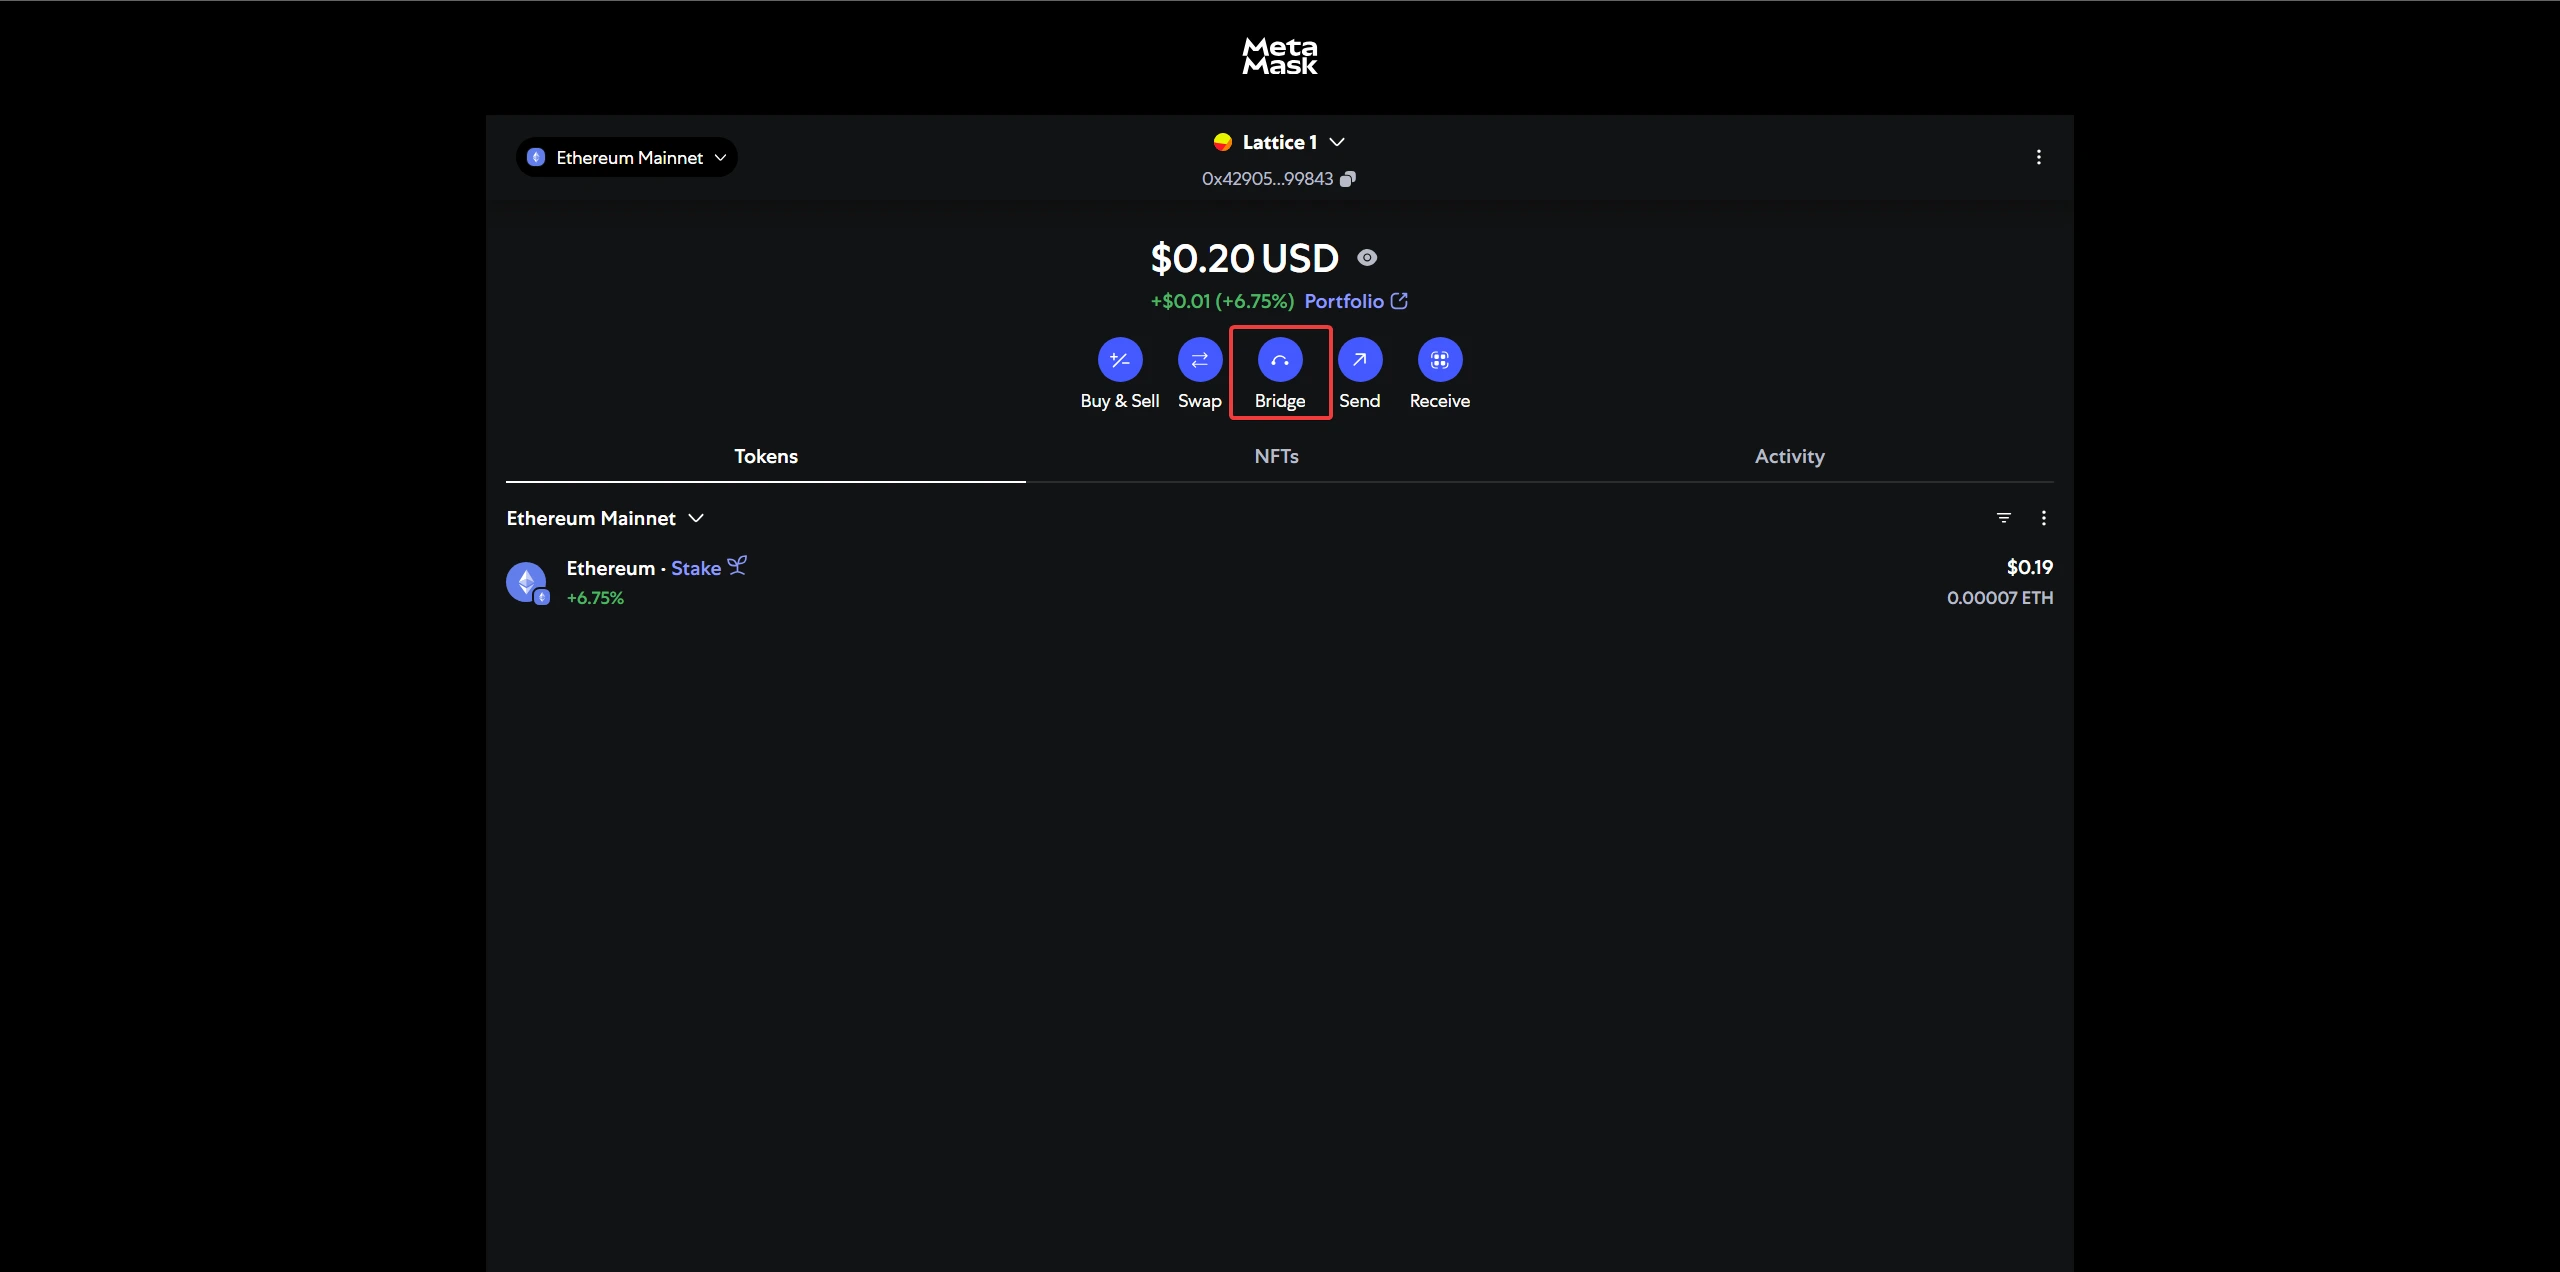
Option 1: Using MetaMask’s Native Bridge
MetaMask offers a built-in bridge service, allowing users to move tokens across networks without leaving the interface. It supports Ethereum, AVAX, BNB Chain, Polygon, Optimism, Arbitrum and Solana.
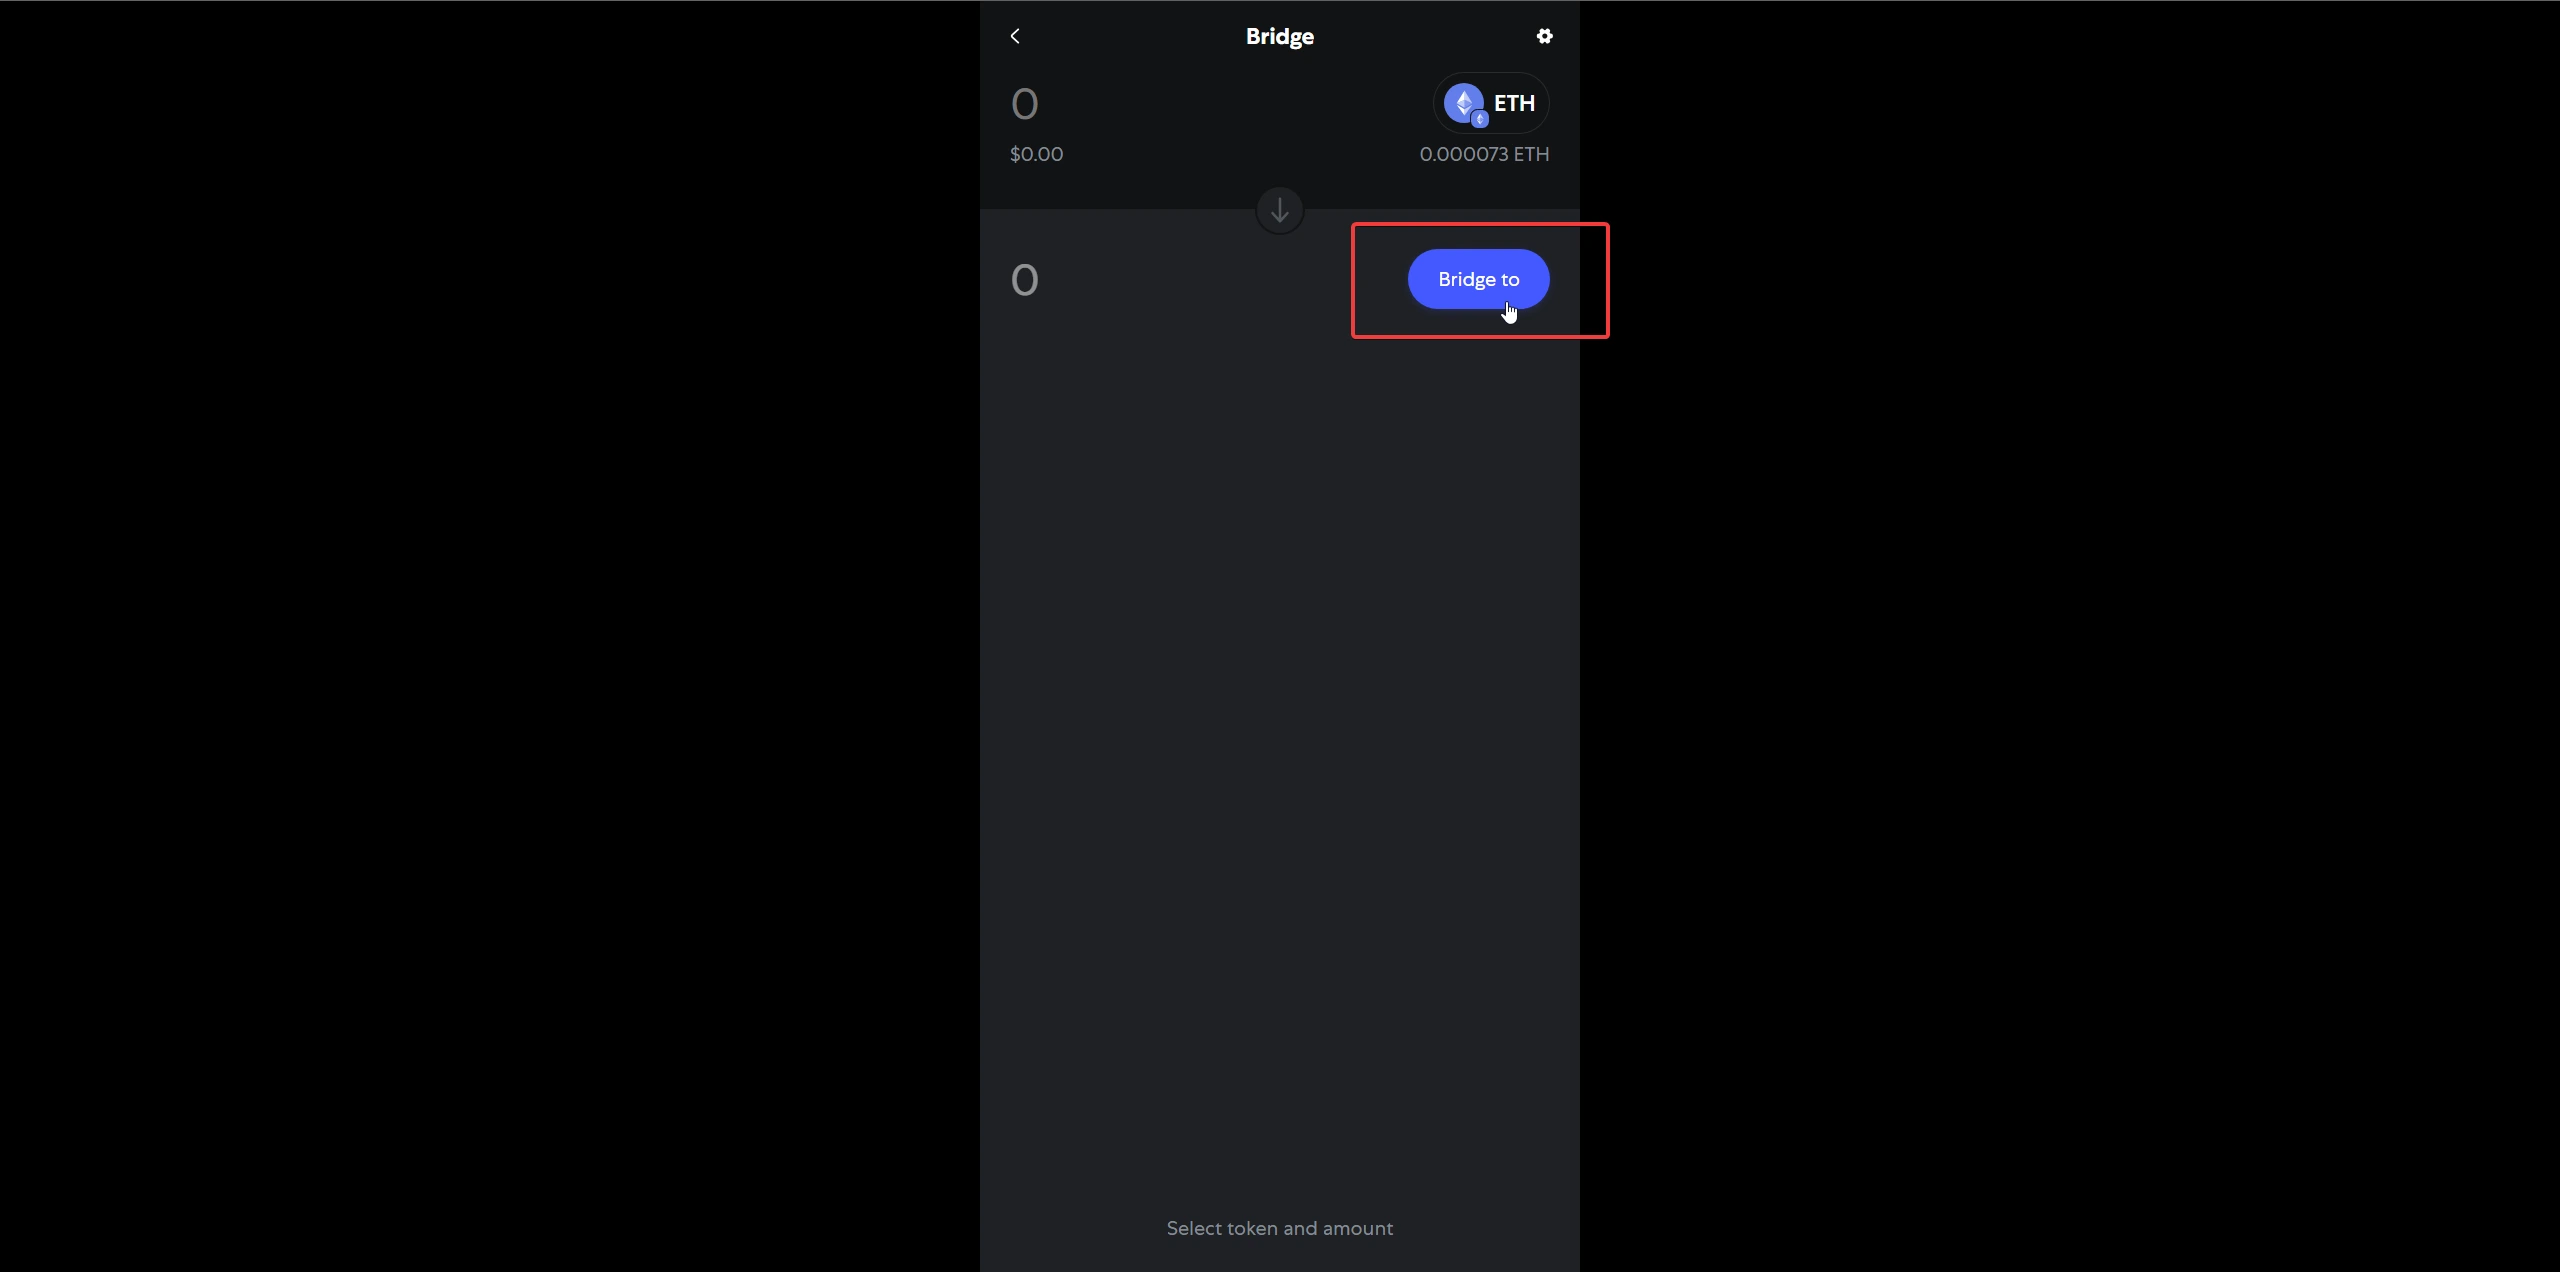
- From the MetaMask dashboard, click Bridge.
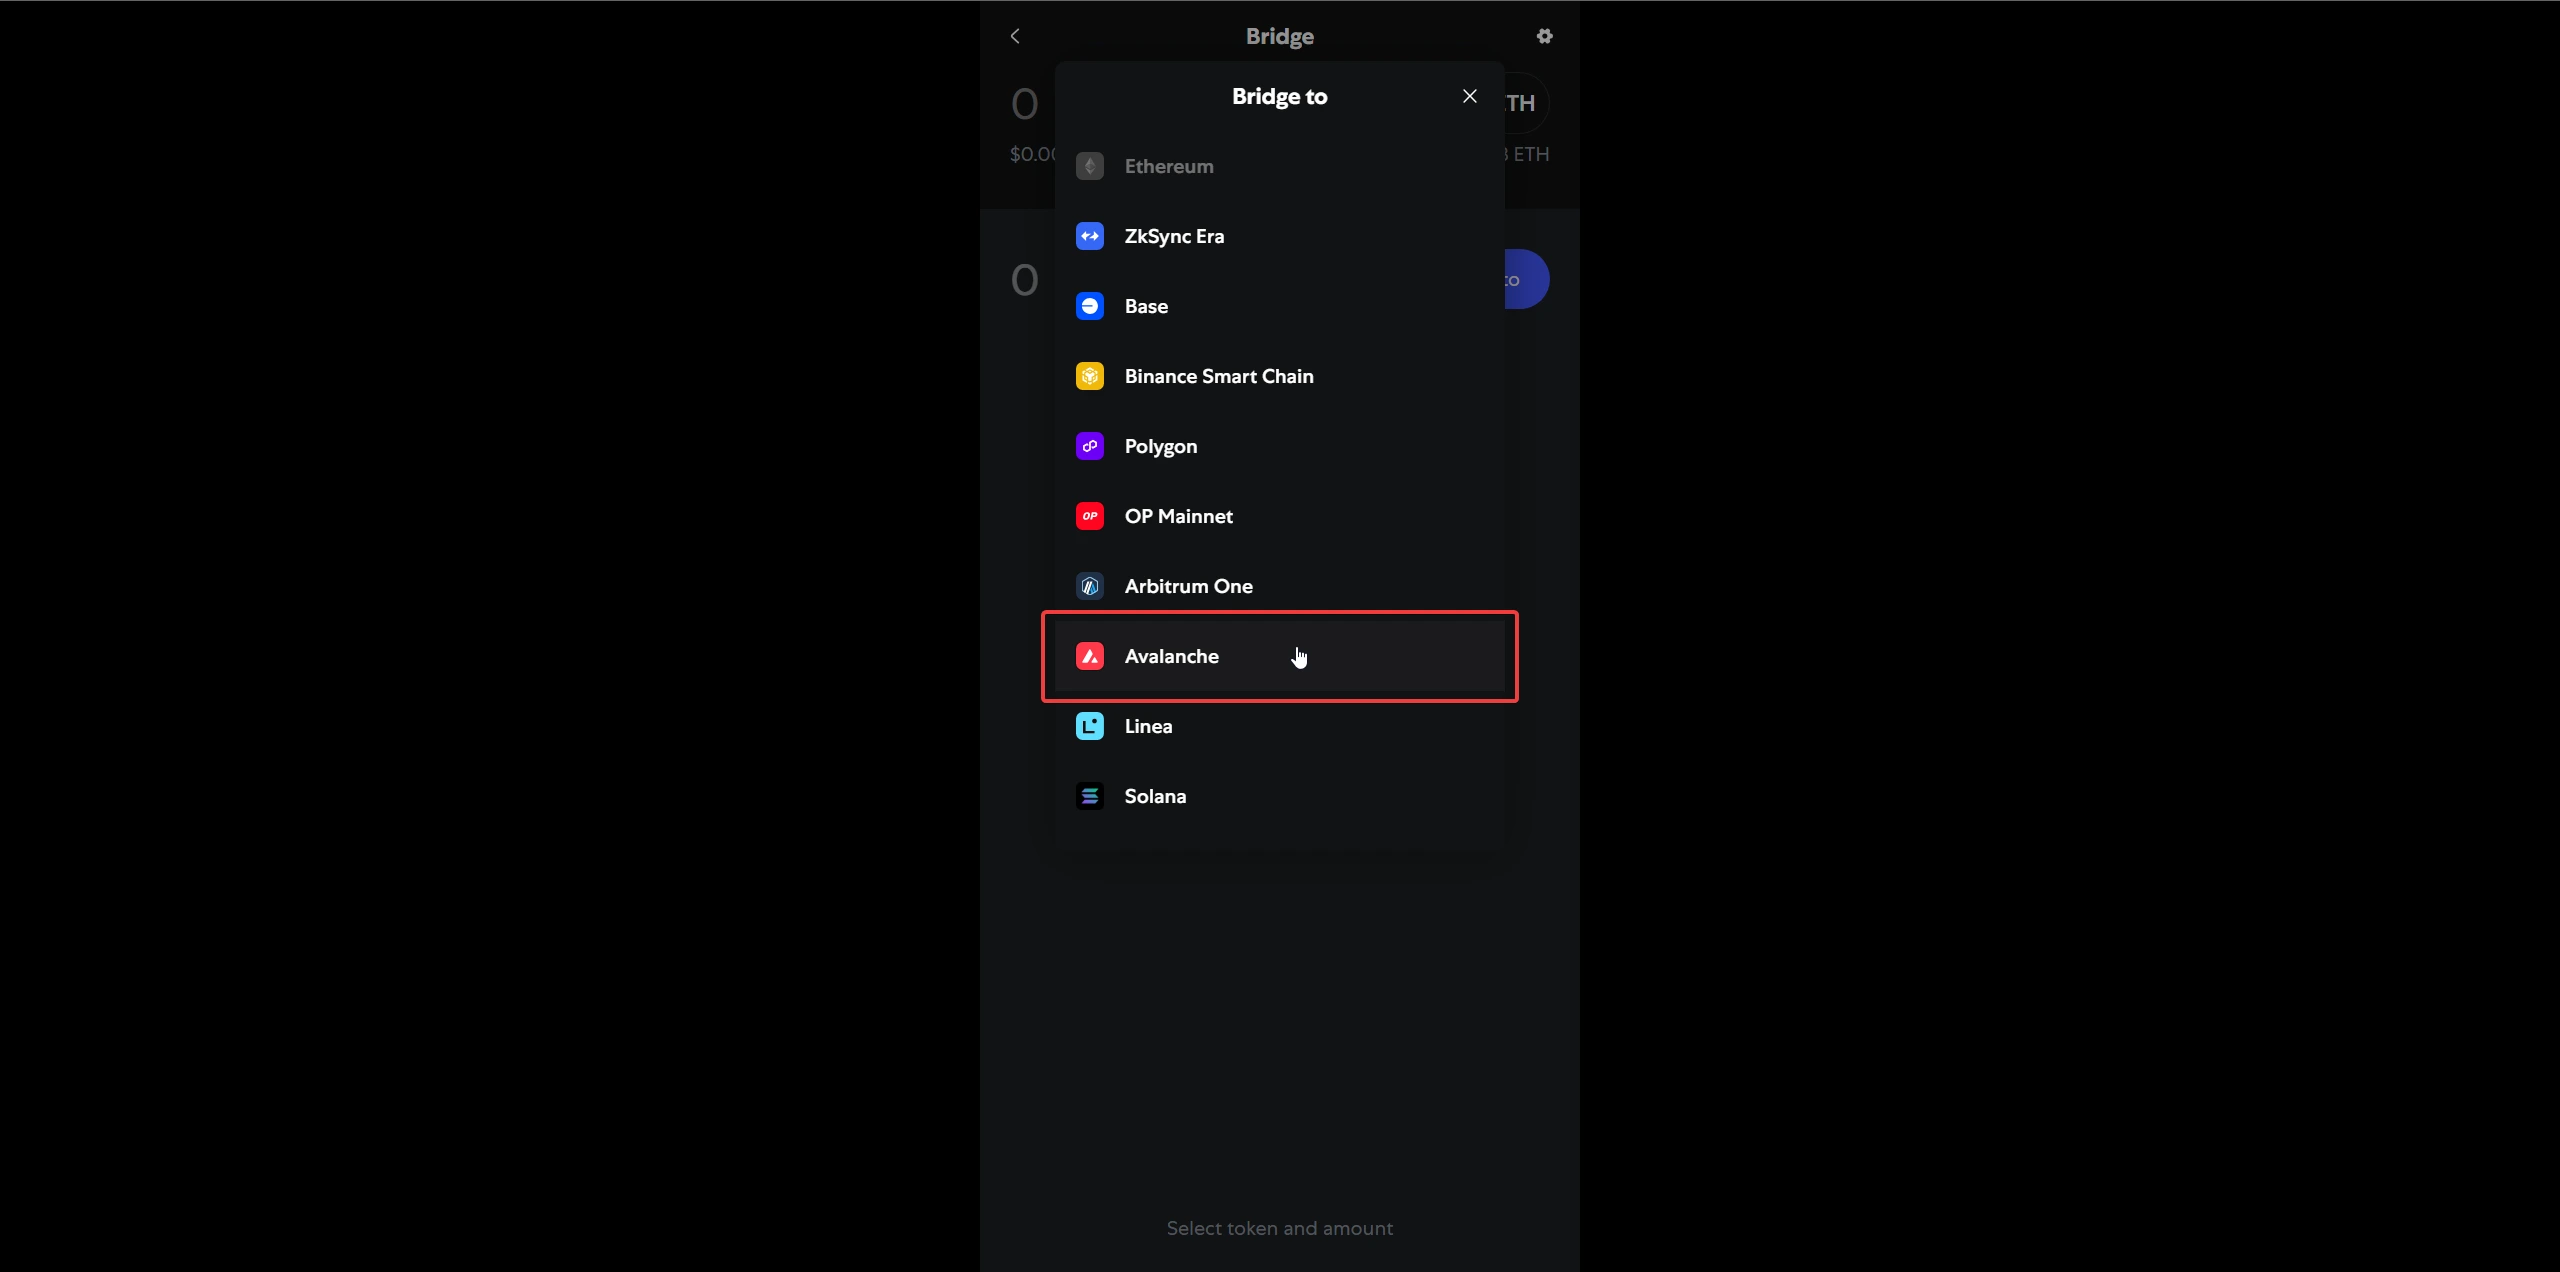
- Then click Bridge to
- Choose the source and destination networks (e.g., Ethereum → Avalanche).
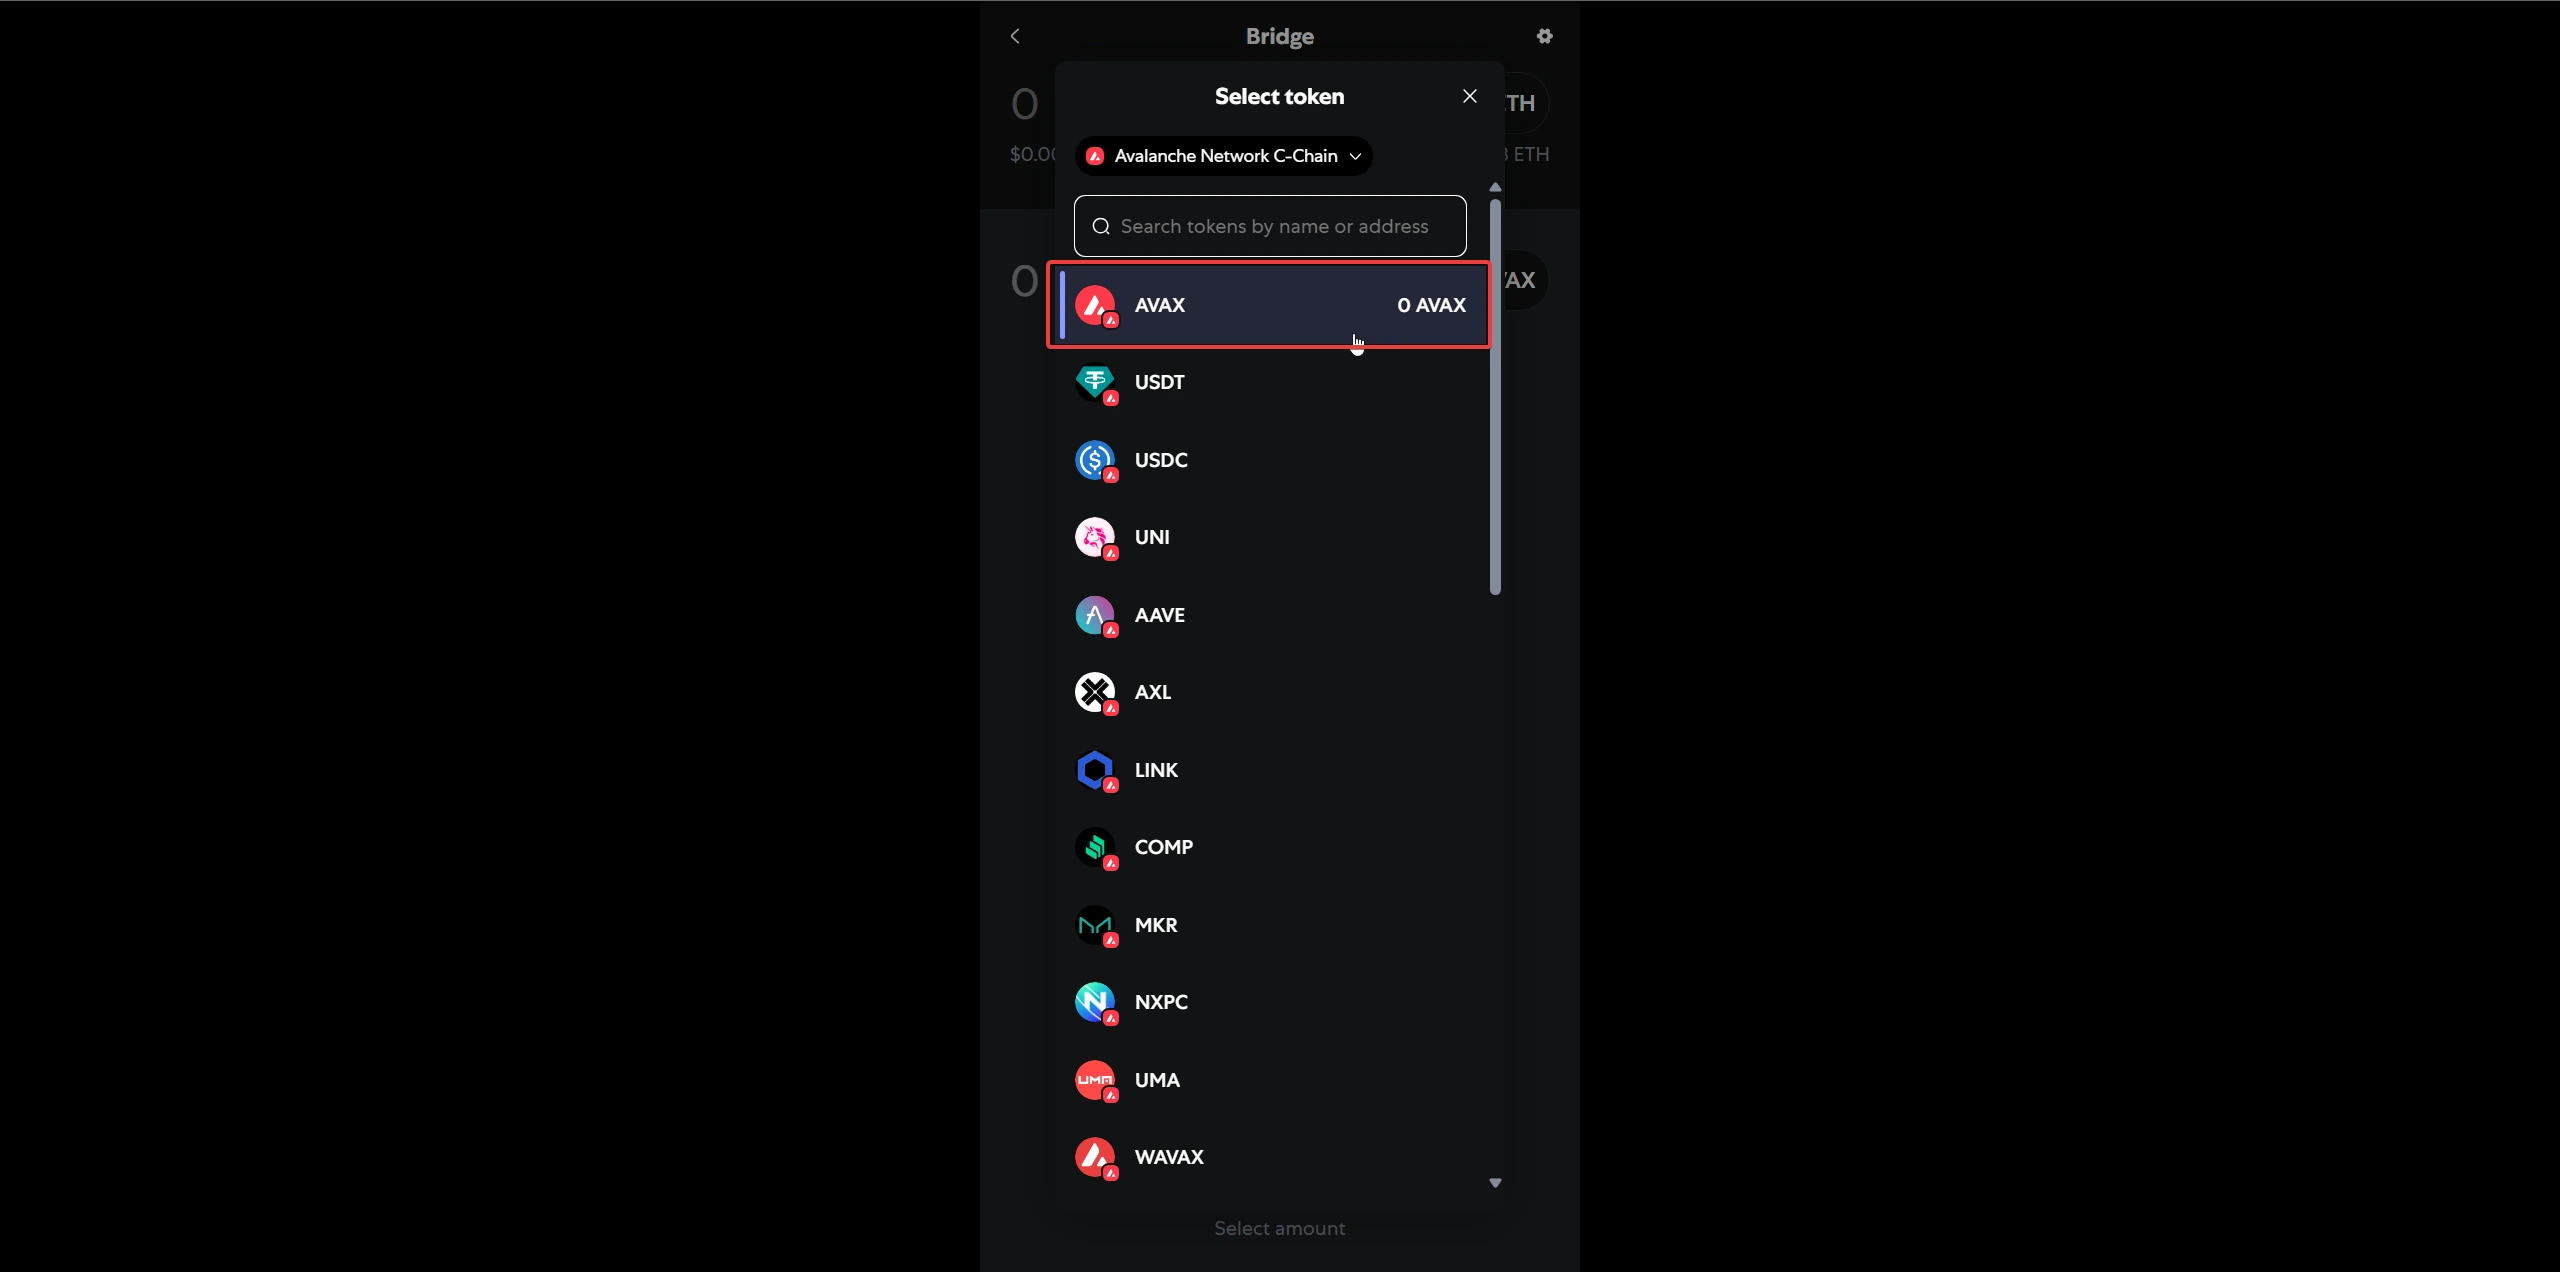
- Select the token (such as ETH, USDC, or DAI) and the amount.
- MetaMask will automatically search for the best bridge route. To see alternatives, click Choose a different quote.
- Approve the transaction and follow the prompts.
Note: A 0.875% fee is charged when using MetaMask Bridge.
Option 2: Centralized Exchange Transfers
Alternatively, AVAX can be withdrawn directly to your MetaMask wallet via exchanges that support C-Chain withdrawals. Platforms like Binance, KuCoin, and Coinbase offer this feature. When withdrawing:
- Select AVAX as the asset
- Choose Avalanche C-Chain (not X or P chains)
- Enter your MetaMask wallet address (make sure Avalanche is selected as the active network)
This method is often more efficient for users looking to avoid high bridge fees or for those unfamiliar with multi-network DeFi operations.
What’s Next? Exploring Other Wallets
While MetaMask covers EVM-compatible chains like Ethereum and Avalanche, other ecosystems require dedicated wallets. If you plan on exploring games or applications on chains like WAX, Sui, or Ronin, you’ll need different setups.
Explore our other wallet guides:


Awesome thanks! I was overthinking it lol
AVAX TRENCHERS ARE GOING TO WIN. MAX PUMP!